
Hey all!!! I hope you enjoyed the Practical Scrappers' blog hop!!! Massive inspiration along the way for sure! And I'd like to shout out a huge thank you to everyone who commented here and became followers and also thanks to Practical Scrappers and Liz Qualman for the inspiration.
Anyway, did you want to Zing on a transparency? I was inspired to do this from a layout of Vee Jennings. Its a really fun technique and a great way to add a punch to your page. Its pretty easy to do, so here's a quick tutorial.
Grab your supplies..........

Versarmark Ink
Zing (or any embossing powder)
Stamps
Heat Gun
Acrylic Block
Transparency
My stamps are a little stained, so I apologize for that. Any recommendations on stamp cleaners? I currently use a Technique Tuesday one but it doesn't always seem to do the trick.
I used clear transparency sheets from Stampin Up. You can also try this on any other transparency pieces you may have in you stash. It makes a cool effect if you use one that already has a design on it, too.
Apply Versamark ink to the stamp and stamp you image on the transparency. Be careful, it can be slippery. Its a clear on clear image so it may be tough to see, but if you tilt it and hold it up to the light, you can see it.

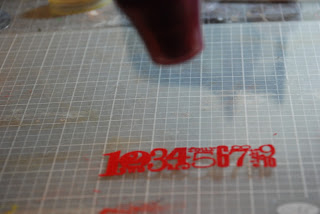
Apply the Zing powder to the stamped image.

Tap off the extra powder, revealing just your stamped image.

And now the heat.........hold the heat gun at least six inches from the transparency and keep the gun moving a lot, it may take a little while for the powder to melt but you will get there.
The powder will start to become shiny and a deeper color.

Let the image cool for a few minutes.
Thats it, done!!
Cut out the transparency piece and create!
I went with a card for this one.

Give this a try!
Anyway, did you want to Zing on a transparency? I was inspired to do this from a layout of Vee Jennings. Its a really fun technique and a great way to add a punch to your page. Its pretty easy to do, so here's a quick tutorial.
Grab your supplies..........

Versarmark Ink
Zing (or any embossing powder)
Stamps
Heat Gun
Acrylic Block
Transparency
My stamps are a little stained, so I apologize for that. Any recommendations on stamp cleaners? I currently use a Technique Tuesday one but it doesn't always seem to do the trick.
I used clear transparency sheets from Stampin Up. You can also try this on any other transparency pieces you may have in you stash. It makes a cool effect if you use one that already has a design on it, too.
Apply Versamark ink to the stamp and stamp you image on the transparency. Be careful, it can be slippery. Its a clear on clear image so it may be tough to see, but if you tilt it and hold it up to the light, you can see it.

Apply the Zing powder to the stamped image.

Tap off the extra powder, revealing just your stamped image.

And now the heat.........hold the heat gun at least six inches from the transparency and keep the gun moving a lot, it may take a little while for the powder to melt but you will get there.

The powder will start to become shiny and a deeper color.

Let the image cool for a few minutes.
Thats it, done!!
Cut out the transparency piece and create!
I went with a card for this one.

Give this a try!
2 comments:
ohh I love this!!
That looks so cool! Thanks for the tutorial!
Post a Comment